
OpenRC F1 Build
NOTE: If you're looking to build your own OpenRC F1 car click here to check out our build guide.
Read on below or start by watching our video "Should I build it?" review of the OpenRC F1 car.
About the build: The OpenRC project was started by Daniel Noree (online handle "barspin") in 2013 with the idea to create free open source RC products that can be easily produced using 3d printing technology. All of the build files are posted online to be downloaded, printed and modified by anyone who would like without charge. Daniel originally began with a truggy (part truck part stadium racer) and a concept touring car but the introduction of his F1 car in 2015 proved to be his most popular RC creation to date gathering more than 330,000 downloads on Thingiverse alone making it the most reproduced 3d RC design of all time.
In 2017 Daniel Noree updated the Open RC F1 with an optional modified design that allows for an overall wider body and lower rear wing and he's made numerous additions to the vehicle every year since. For this project we've decided to stick with the original design (which is still the most popular) and to make updates as necessary but please check back for future updates for when we get around to building the 2017 version as well.
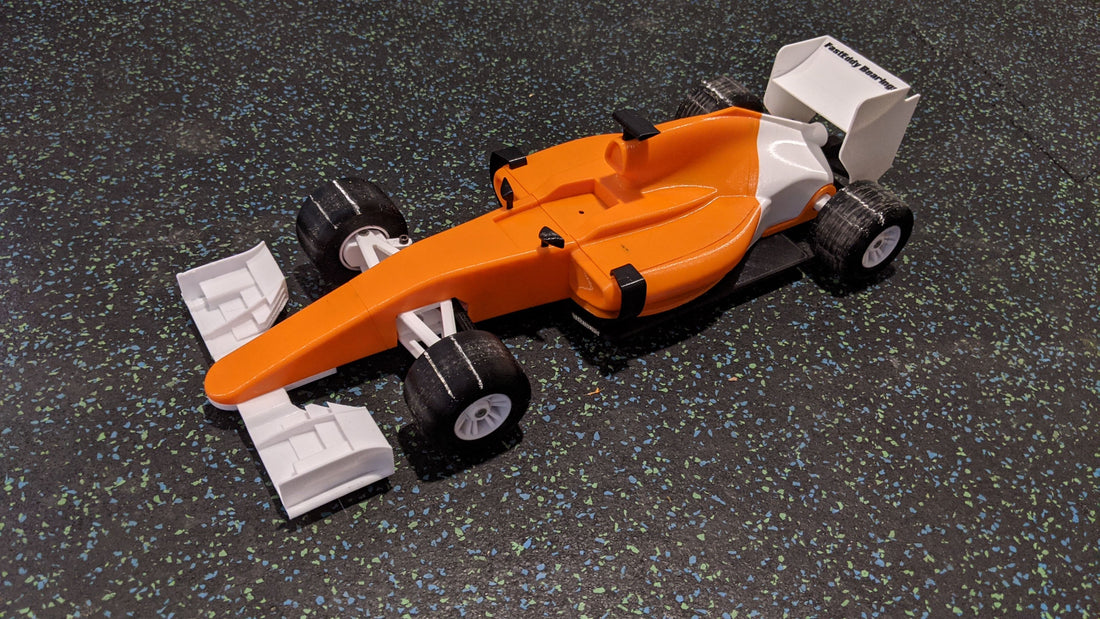
Our build: Our first OpenRC F1 build was completed in January 2021. Our build consisted of parts printed in PETG filaments in orange, white and black. Our original set of tires were printed in TPU. Generally, OpenRC F1 cars are recommended to be printed in PLA, as are most open 3d designs online. After building this one in PETG I have to agree that our next one will likely be built with PLA as Daniel Noree recommends the fit of the servo saver and nuts crevaces wasn't as tight as we would have liked due to the shrinkage of PETG. However, we do like the added strength provided by PETG filaments so that is definitely something to consider.
All parts were originally printed with standard two walls minimum and 20% infill except for the gears which were printed at 100% infill. For the steering parts upfront this turned out to be not enough and we ended up reprinting those parts with 100% infill and I would recommend that you do the same as well. In hindsight, I would have printed pretty much everything with 6 walls and 100% infill. In my view, printing small RC parts that are going to take stress with less than 100% infill doesn't make a lot of sense because you can create a thin hollow area in the middle of the piece which will be a weak point and prone to breaking. To print most RC car parts with many walls and 100% infill will take only minimally extra plastic so I don't its worth saving the dollar or two in filament. Especially when you consider all of the costs that will go into an RC build such as batteries, motos, servos, esc, radio etc, the extra cost of filament to print at 100% is negligible and if you're spending all that time and money you might as well end up with a product that is a little bit stronger. RC car you buy from your local hobby shop will have parts that are injection molded resulting in 100% infill and that provides the strongest part.
Tires: Originally we started off printing the tire designs that come with the model in TPU but we found they were too slippery so we opted to print these hub adaptors and buy some cheap 1:10 scale rc wheels with rubber tires and 12mm hubs instead and we found they worked much better.
Gearing: We found the stock gearing also didn't work great for our motor and new tires so we printed this set of new pinions and spur gear off thingiverse and we settled on the 9 tooth pinion for our model. Depending on your motor and tires you might also find the gearing needs to be changed so I'd recommend just printing the full set of gears so you can adjust easily on the fly.
Electronics: We went with a brushless motor esc combo off banggood for our original build however if I were to do it again I'd just go with a brushed motor instead like the 35T combo kit with an ESC in our store. Its recommended to go with something around 36 turns for a brushed motor like the one in our store. For a radio transmitter we went with the recommended Flysky FS-GT3C but it seems a bit expensive and overcomplicated for a model like this so we'd recommend something a bit cheaper like this Flysky FS-GT2B from AliExpress. For a servo you'll need to get a micro servo rather than a standard size one. We opted for a multipack of 9G servos but you can just get one included with your kit in our store!
Take a look: Here are some photos of our completed F1 build:


If you are interested in more information on our OpenRC F1 build or would like to learn more on how to build one yourself please check our our build guide here.