
Skeeride RC Snowmobile Build
We took on the challenge this winter to build the new Skeeride 3D printed Snowmobile and had an absolute blast doing it.
<<Read on below or start by watching our "Should I build it?" review of the RC sled.>>
About the build: The Skeeride RC Snowmobile was developed by MyMiniFactory user @builditbetter. He couldn't find a design for a snowmobile available online that he liked and could buy so he decided to make one himself. Previous 3D projects of his available on MyMiniFactory include an array of semi truck and heavy machinery models but this was his first RC project posted online.
The original designer was inspired by other 3D printable snowmobile projects he found displayed on the web. I suspect he took some notes from the RC projects of Canadian designer Pascal Robert whose youtube channel has garnered almost 10,000 subscribers based largely on the love of his Snowmobile rc projects. Pascal has yet to offer his complete 3D printable RC snowmobile models to the masses despite demand for it being very high (as evidenced by the comments on his videos).
According to the designer the goal of the Skeeride design was to be as simple as possible so that it can be easily printed and made by anyone.
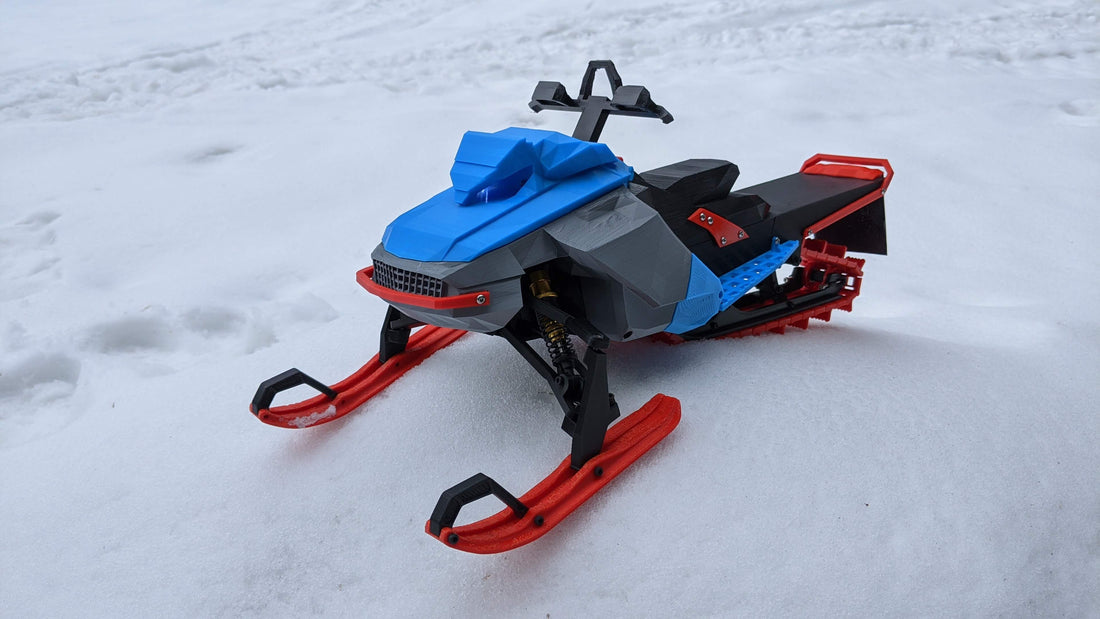
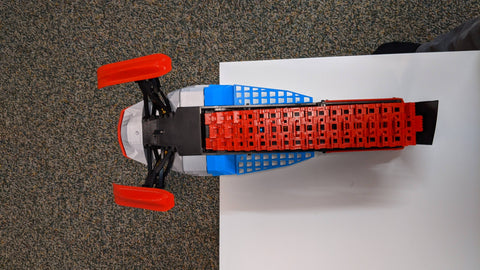
Our build: Our first Skeeride was completed in January 2021. Our build consisted of parts printed mostly in PETG with some of the body sections done in PLA. The designer recommends printing in PLA but we had good success with PETG and think either choice would be appropriate for this model. We settled on a red and blue color scheme with some black for the frame and undercarriage and a little grey for contrast. Initially many parts were printed with standard 2 walls and 20% infill but through many reprints we now have 6 walls and 100% infill through all of the front suspension parts, main body, both skids and tracks. Printing the parts was quite simple and most parts can be printed without supports. Parts that require supports are designated with "sp" as a suffix to their filename.
Model Strength: The model itself is fairly sturdy and we've found it will last pretty well unless you're jumping it or running it into objects or if you let the track get loose. If you're jumping the model you're going to break the steering knuckles constantly so I'd definitely recommended printing those with 100% infill. Also, the designer has put in beefier updated steering knuckles as a mod in the design files so I'd highly recommend you use those instead. If jumping continues you're also likely to break the a-arms so print those as well with 100% right from the start. Finally, if you keep jumping it you'll eventually break where the a-arms connect to the main body frame so I would also recommend printing that with many walls and high infill. Yes, its a bit of a waste of filament here but I think its worth it.
Track lugs will bust off from time to time as they also do on a real world sled. This is to be expected and is easily fixed with replacement parts. However, you should know that if you let your track get too loose it will eventually spin up and hit the bottom of the chassis which has a nasty little section for the track to catch on and you'll end up blowing up your whole track and be in for many hours of reprinting and repair. Its happened to me, be warned it can happen to you too.
I've also had some issues with the steering arms busting as they are one of the most delicate parts of the model and it would be nice if the designer would come up with a 3d printed solution for that as well.
Electronics: For the motor we decided to go with a 3650 kv brushless sensorless motor and esc combo off banggood instead of the sensored one the designer recommends, mostly because its was out of stock at the time. Its a bit cheaper and it works fine but I do wish I'd gone with something a tiny bit more powerful and will probably upgrade before too long. For the servo I just used a cheap amazon one from a metal gear multi-pack which seems to be fine as the steering arms do seem to bend quite easily before shredding the servo gears which are actually plastic, not metal, inside the servo. For the radio I opted for a cheap-o flysky from our local hobby shop very similar to this one. The model specs call for a 3s lipo battery and its definitely the minimum you'll need to get that track moving at a decent speed you'll be satisfied with. Initially, the battery we used is this 1500mah 3s lipo and it has to be physically not much bigger than this to fit in the main electronics compartment. However, the designer has released an optional mod for the machine which will allow you to store a 4000+mAh soft pack lipo battery under the seat instead of in the main body which I would highly recommend.
Gearing: The model calls for a set of metal pinions and a Traxxas 56tooth spur gear. This works great but I've found the Traxxas gear to be overly expensive and not always very easy to get so one of my top wishes for the project would be to find a way to replace the spur and pinion gears with 3d printed ones. For our 3650 kv motor we found a 16 tooth pinion seemed to give the model just about the right amount of power when matched to the 56 tooth Traxxas gear. Power is transferred from the spur to the track through a set of 3D printed herringbone gears and sprockets which I have had no problems with at all.
Take a look: Here are some photos of our first completed Skeeride build.


3 comments
The original Skeeride is not belt driven although you can install a belt drive mod. The new Skeeride 2 is belt driven and we will have those kits in stock soon.
To complete a skeeride build you need everything in the description on the designers page here: https://www.myminifactory.com/object/3d-print-skeeride-rc-snowmobile-143369
Is the RC snowmobile belt driven? Where can I get the belt and the clutch?
What do I need to order to do a complete skeeride build?